
BMW 760i Repairs page 4
1. Engine re-seal
This car appeared to have been leaking oil for some time... oil was dripping onto the exhaust manifolds and running down the sides of the engine. There may be other leaks but the valve cover gaskets appear to be the main issue and on this car are a fairly big job to replace. I elected to address all the common leaks...
In the pic below I have already removed the fresh air filters, air ducts and center wall at rear of engine. Also the air intake boxes, boots and MAF sensors from the front of the engine.
The black plastic pieces were cleaned, inspected and treated with Mother's back-to-black which works wonders on tired plastic parts. I stored them in the trunk for the duration of this project.

The engine bay is a maze of cables and hoses, most of which will be removed.
Many of these pics are a record of what it looked like so I can re-assemble it correctly!


When I removed one of the throttle bodies to clean and test it each of the 4 x bolts came out with aluminum thread attached! Fortunately the thread extended much deeper in to each hole and I was able to fix this by installing longer bolts (actually studs to avoid this ever being an issue again). The other side came apart without issue!

Removing the intake plenum is fairly straight forward (disconnect yellow circled items below) and lift it off. Pulling the hoses off the PCV valves was the hardest part!

Whoever worked on this car in the past left off 2 brackets that secure the intake plenum to the valve covers.
A mounting bracket attaches to the red circled screws in the pic below. Fortunately I was able to find the missing parts at the junk yard (first and only 760 I've ever seen there).

And what's with all this white grease everywhere... who ever worked on this car in the past pasted this stuff everywhere!


The intake manifold gaskets are Victor Reinz and appear to have been swapped out fairly recently. Unfortunately the grommets on the bolts were not swapped out.

I couldn't find just the grommets so I had to buy the complete screw assy. Fortunately these were on clearance at FCP but I still paid $156 for a set of 12. Regular price is well over $200!
The problem with these is the grommets flatten out and no longer press the intake manifold against the gaskets. You can see some of the sleeves on my original parts deformed due to over tightening which should not happen with new grommets.

I was pleasantly surprised to find all 12 ignition coils are only about 1 yr old (date code is week 25 of 2017 and week 19 of 2017 below). These are BMW-Eldor parts.

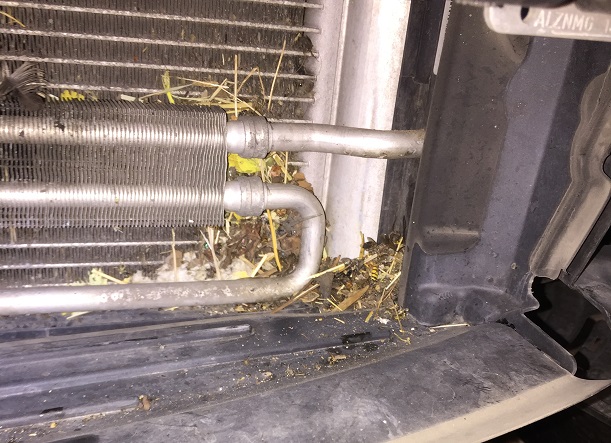
I pulled the front bumper and fan off to gain better access to the radiator as I could see there was a lot of debris trapped in there.

Debris trapped in the fins of the radiators! I ended up removing, washing and blowing out all of these (coolant radiator, A/C condenser, PS cooler and engine oil cooler). Airflow will be much improved now!

The engine oil cooler mounts on top of the condenser. It's looking a bit grubby on this side but is actually in good shape. The front was painted black and the paint is flaking off. This radiator is easily removed with just one bolt on the end.

After removal and cleaning here are the radiators in their carrier. Its not obvious from the pic but I spent a great deal of time cleaning and blowing out what seemed like a never ending amount of grit and debris from these radiators.

After draining the coolant and removing the radiator I got a better look at the front of the engine which is covered in oil!
More than likely this is an oil leak from the alternator bracket (another common issue) so I will be replacing that seal.

There's a lot of oily dirt on the passenger side perhaps from the vacuum pump oil seal. I'll be removing everything from the front of the engine to get a better look and thoroughly clean this up also.


There are a lot of wires and hoses that need to be removed...

This is a huge engine and not easy to work on in the car. To gain better access I removed the radiator, oil cooler, condenser and the carrier (power steering cooler as well)... now I can stand directly in front of the engine which makes working on it a lot easier on my back. It also gave me much improved access to the front of the engine which needs a thorough clean.

I had to discharge the A/C to remove the Condenser. There were no signs of any leaks... pressure was good (~80psi) prior to bleed down.

Lots of oil seepage on both sides of the engine. Left side looks like it may be the gasket on vacuum pump and/or upper timing case cover.

Source of the right side leak is not so obvious but the alternator bracket is a well documented issue on BMW's so I will be removing it to replace the gasket. Alternator is removed in the pic below.

There is a wax like substance that appears to have run down the front of the engine, I'm not sure what this is (maybe Cosmolene). The yellowish stain at the front of engine may be from coolant... leaking from the weep hole or water pump. Both are common problems on BMW engines of this era (V8 and V12's). I will replace the coolant transfer pipe and waterpump.
I started working from the bottom up (not the smartest way to clean an engine but can't clean the top until I move everything out the way). Cleaning the engine was a long, dirty and tedious task.

Before removing the alternator housing I removed the power steering pump. It is held in place by 1 x nut and 1 x bolt on the front and one nut at the rear and 3 hoses to disconnect.


It was an easy job then to remove and clean up the PS fluid reservoir.

Then I removed the alternator housing along with the oil cooler lines (2 bolts at the front and 3 on the side... all easily accessible). There are a couple dowel pins that line things up so you have to gently pry the cover off.

The oil cooler lines and thermostat assy are held on by a couple of 5mm Allen screws (there's 2 x O-rings to replace).

Here you can see where the seal goes (that often fails) .


Still a long ways to go...

Following pics are to remind me where things go...


Slowly but surely, 12 years of accumulated grime are being cleaned away (I doubt this engine bay has ever been cleaned since the car was new)...
I used a small puller to remove the vanos solenoids (makes it easy). These will get new O-rings.


Each solenoid has a resistance of about 10 ohms. I test them with a cheap pulse width modulator (motor speed controller) purchased on Ebay. As the duty cycle of the applied 12V changes the plunger inside the vanos solenoid moves in and out. It doesn't move much - maybe 1/4", just need to verify it operates smoothly with no sticking. All 4 checked out good.

The front of the engine is looking a lot cleaner now... it's so much nicer to work on a clean engine.


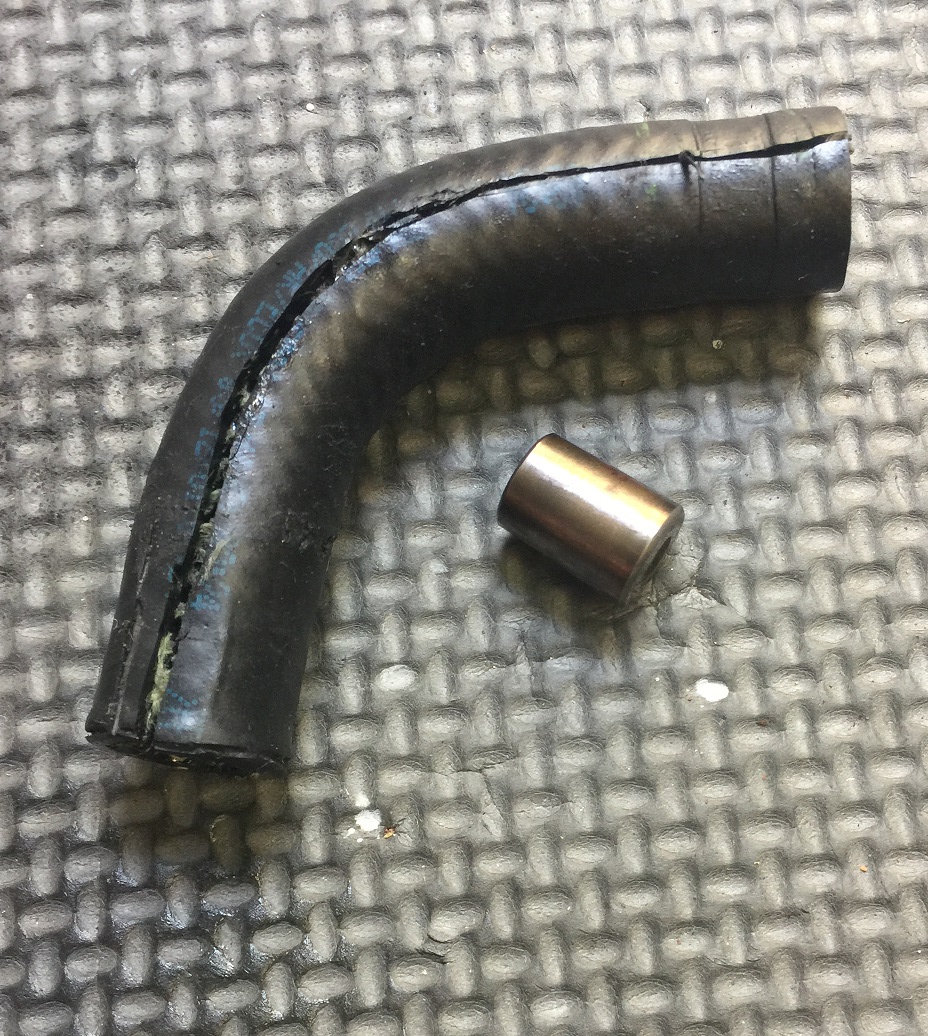
While removing the fuel hoses at the top rear of the engine I found one with a ball bearing pushed into it! Then I found this hose with a strange bulge in each end of it...
This is a fuel breather hose for the high pressure fuel pumps and looks to have been recently replaced. When the pumps start to go bad they will leak fuel into this line which causes the engine to run rough. I was told the High pressure fuel pumps had been replaced and they have dabs of yellow paint on the attaching bolts to suggest so. Now it's starting to look like a hack job.


Its hard to get a good look but you can see the blockage in the pic below. I tried to push it out with compressed air but it wouldn't budge.

So I ended up removing the short hose on each end of this hose assy (it will be a lot less expensive to replace these than the complete assy).


I cut this end open and to reveal the blockage ... looks like a roller out of a large bearing (it's solid metal)... can you believe it!

Here are the High Pressure Fuel Pumps (HPFP). I ended up replacing these with a newer pair I picked from a salvage yard that I also rebuilt with new diaphragms.

Here is the driver side exhaust manifold heat shield and the VVT motor with its mounting hardware. Re-secure the dipstick and a fuel valve with bolt shown before installing the heat shield.


This o-ring seal will be replaced.

Finally got the engine harness out of the car which will make working on the engine a lot easier...

The hardest part of removing the engine harness are the starter motor connection and transmission connector. In order to disconnect the starter (connector) you have to remove the heat shield that is bolted to it (1 x 10mm bolt and 2 x 10mm nuts). Access to do this is very limited, you have to reach up from underneath. I had to disconnect the battery cable to the starter (13mm bolt) as well because the starter wire was wrapped around this. Skinny hands will make the task much easier. The transmission connector releases easily enough but there is an a/c drain that runs down the side of the transmission that must be disconnected and moved out of the way to make room to feed the transmission harness down the side of the transmission and out. There are a few clips that hold the transmission harness in place and a couple of these are very difficult to release, skinny hands can just reach them. Everything else is easy to get to and unplug (4 x oxygen sensors, Crank position sensor, oil level sensor). Once it is all disconnected you feed the wires up and can lift the harness out the engine bay. In the pic below I have all the E-Box connectors bundled in an anti-static bag.

The engine harness was cleaned with a toothbrush and picks. One or 2 of the connectors were a bit oily so I cleaned these up. Several connectors do not have back shells. I don't think they are missing, there just isn't enough room to add them. I wrapped these with self fusing silicone tape just to help protect them. It looks a lot neater too.

With a bit of gentle persuasion the first valve cover loosened up and came right out! The spark plug tubes seemed to provide the most resistance.


Everything looks nice and clean in here with minimal wear on the cam shaft lobes. I'm not going to do the valve stem seals this time around. The valve cover gasket and other seals, especially those on the bolts are all shot and easy to see why it was leaking oil.
Next I removed the fuel rails and intake runners. One of the threaded holes in one of the intake runners is stripped so I'll be installing a time cert (thread insert that is much better than a Helicoil).

The Time-Cert process is first to drill out the hole with a drill bit and then drill the step (both included with the kit)

Tap the hole to accept the insert.

Here's the finished result... better than new! The pic below also shows a loose insert.

The fuel rails required some gentle persuasion to separate from the injectors. I squirted penetrating oil into the seal on each fuel injector and gradually they popped loose. The water pump was also removed.
After some more cleaning it now looks like this...

Fuel injector wiring harness removed.

Wiring harness connection into E-Box.

The knock sensors were removed next. The plastic sheathing on the wires to each of these was falling apart but this appears redundant as the cable underneath is in perfect shape.

What is all this tan colored crud around the valley pan cover (I'm guessing dried coolant/oil mixture)? It scraped away quite easily with a pick and vacuum hose.
Most likely this is the source of the coolant smell I noticed when buying the car.


With the injector harness out of the way I removed the injector retainers. These took a powerful impact gun and T30 Torx bit.

As you can see below, the mechanic that worked on this car did not reassemble these correctly... the washers on the bolts below are domed spring washers... they are correctly oriented on the left side but not the right! These keep pressure on the injectors to hold them in place. I correctly re-oriented them.

Here's one of the injectors. This has a 2016 date code (yy-mm-dd)... so fairly new!

Unfortunately only 7 of 12 injectors appear to have been replaced which is a bit strange. The remaining 5 have a mid 2005 date code and so appear to be original. I wonder if the past owner paid for a full set and got short changed!
The newer injectors were easily pulled out by hand and covered in white lithium grease! I needed a small slide hammer to get the others out which worked well (15pc slide hammer puller set from harbor Freight).
All of the injectors were sent out to be cleaned and tested (Mr. Injector at a negotiated cost of $20 ea).

Replacing the coolant transfer pipe (and seals)
First remove the valley pan cover... I'm always nervous removing valley pan bolts as coolant seeps into the threads and rusts them... thankfully these all came out without breaking. I'll replace with new bolts and a new cover.

![]()
To remove the transfer pipe I first wrapped a piece of plastic around the pipe to help contain the mess and then cut a large hole in the top with this hole saw. The aluminum pipe is soft and cuts easily.


And then another slightly smaller hole in the bottom.

And then a hacksaw blade to cut the sides and out it came.

The front seal that was originally vulcanized on the pipe remains in the engine housing and is easily removed with a pick. It's not obvious in the picture below but when shining a light into the seal opening it can be seen in the weep hole to the left... this is the coolant path when the seal fails.

I installed a URO telescoping coolant transfer pipe which didn't go quite as easy as expected...
Below is the rear section of the URO pipe. You can see a resin spacer installed on the end that is contoured to fit against the engine block. I had to sand this down a little for a good fit. The wide section of this spacer must be on top... I marked it so with a marker pen.
![]()
At first the rear section would not line up with the opening at the rear... the pipe was sitting too high in the engine block.
I had to sand the block down in 4 x places... First I plugged the coolant channels adjacent to the areas being sanded, then wrapped some 220 grit wet and dry sandpaper around the rear coolant pipe. Using the coolant pipe as a sanding block I moved it back and forth in the channel until the coolant pipe sat low enough to line up with the rear opening. You can see the 4 areas sanded in the pic below (very little metal was removed).
![]()
After this I dry fit the pipe without front and rear seals to make sure the length was correct. Basically it needs to but up against the block at front and rear with a groove for the retaining clip lined up just right. To achieve this I had to sand down the resin spacer a little.
When I was happy with the fit I installed the rear O-ring and the front seal. URO provides dielectric grease for the O-rings. I used it for the rear only. I used black RTV adhesive sealant on the front seal... I worked it into the opening before installing the seal then worked the front seal into place... when you can run your finger around the seal and it feels smooth with no bumps it is installed correctly. I also applied adhesive sealant to the front outer edge of the pipe as well. I figured adhesive sealant will help ensure a more permanent seal than would dielectric grease.
Then I installed the pipe assy. It must be pushed into the front seal first and it takes quite a bit of force to do so. You can pry it from the rear end of the pipe. I fashioned a tool to hold the front section in position (if you don't hold it in place, it will squeeze itself out of the front seal). Then I pressed the rear section into the rear O-ring making sure the resin spacer is oriented correctly (wide side up).
With everything now in position you can work the retaining clip into position which locks everything in place. Below is the installed pipe.
![]()
Here's a better look at the retaining clip that locks the pipe sections in place.
![]()
Looking into the front of the newly installed pipe. The hole to the left is the coolant weep hole. If the front seal starts to leak, coolant will accumulate in a cavity around the seal. The weep hole drains this cavity before the coolant can work its way past the timing cover gasket and into the engine sump.
![]()
Walnut blasting the intake valves
Its a common problem on direct injection engines... because there's no fuel flowing across them, oil/carbon (from the PCV system) builds up on the intake valves and should be cleaned off every 50K miles or so.
I used a Harbor Freight blaster with a modified wand and fine walnuts (also from harbor Freight). Air compressor set to ~ 100psi.
I needed to use a pick to clean around the edges of each valve. Walnut blasting is quick but the final cleanup with a pick takes much longer. It spent about 8hr getting them all looking nice and clean!
Before:

And after:

New Valley pan cover installed.

New Alternator bracket seal.

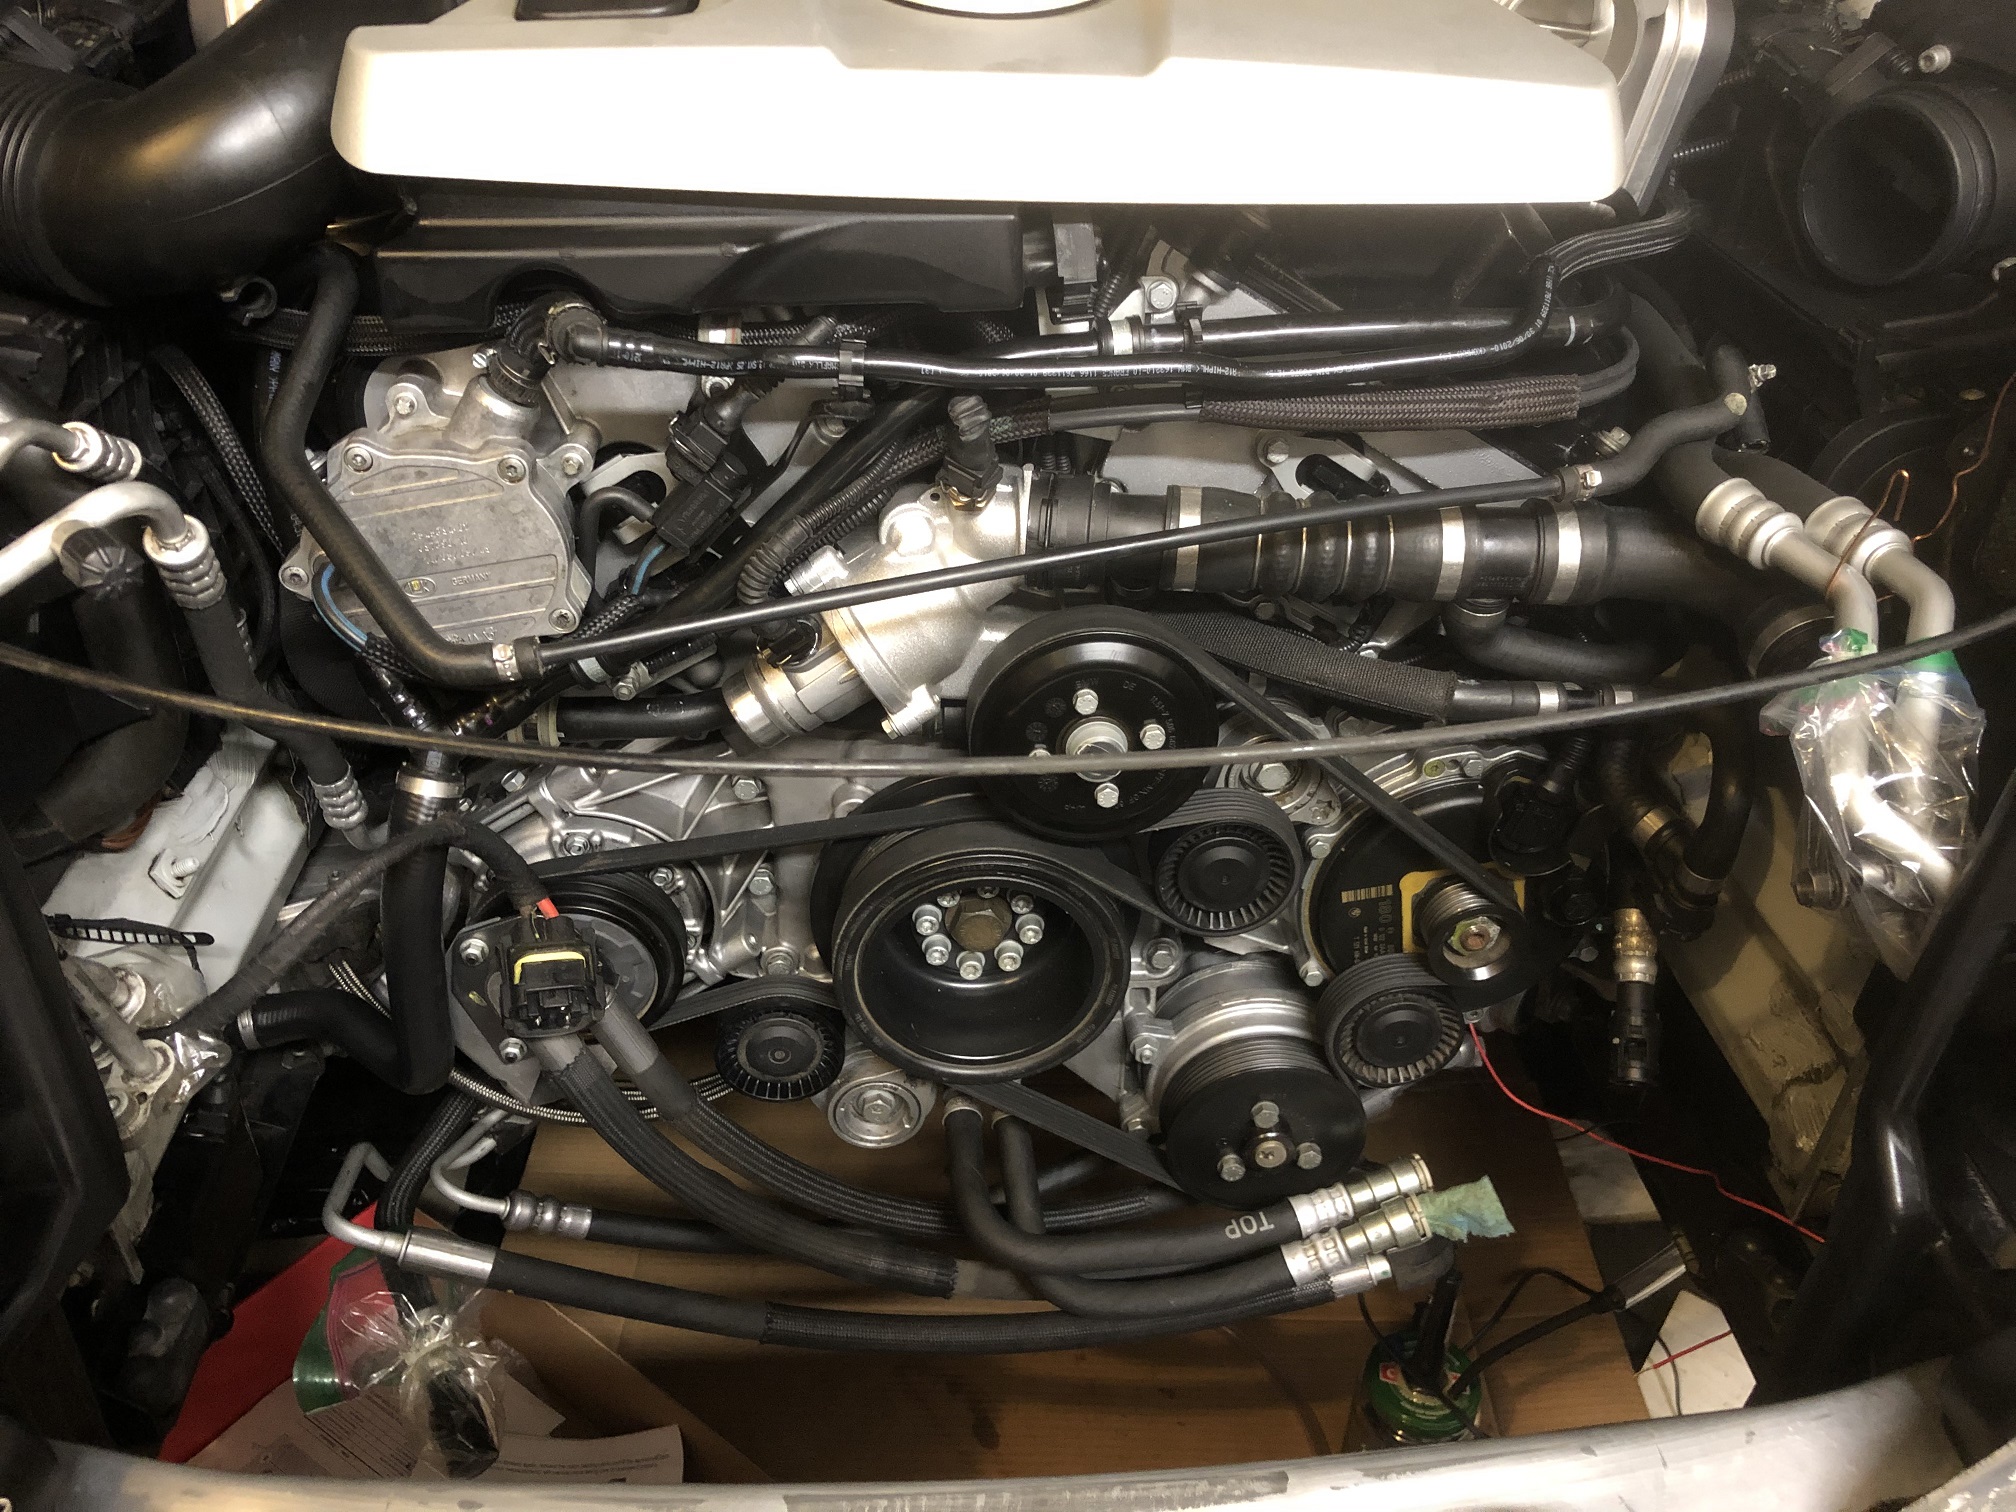
Alternator bracket, Alternator, Power steering pump and one upper timing cover installed... the rebuild begins!

When fitting new valve cover gaskets insert the spark plug tubes into the head first.

New valve cover gasket applied to valve cover.

Fitting the variable valve cam timing motors is a bit tricky... had to keep rotating the part that mates with the motor shaft until the motor would seat fully into the valve cover.
Also fitted a new water pump and thermostat.

High pressure fuel pumps and fuel lines installed...

Engine wiring harness installed...

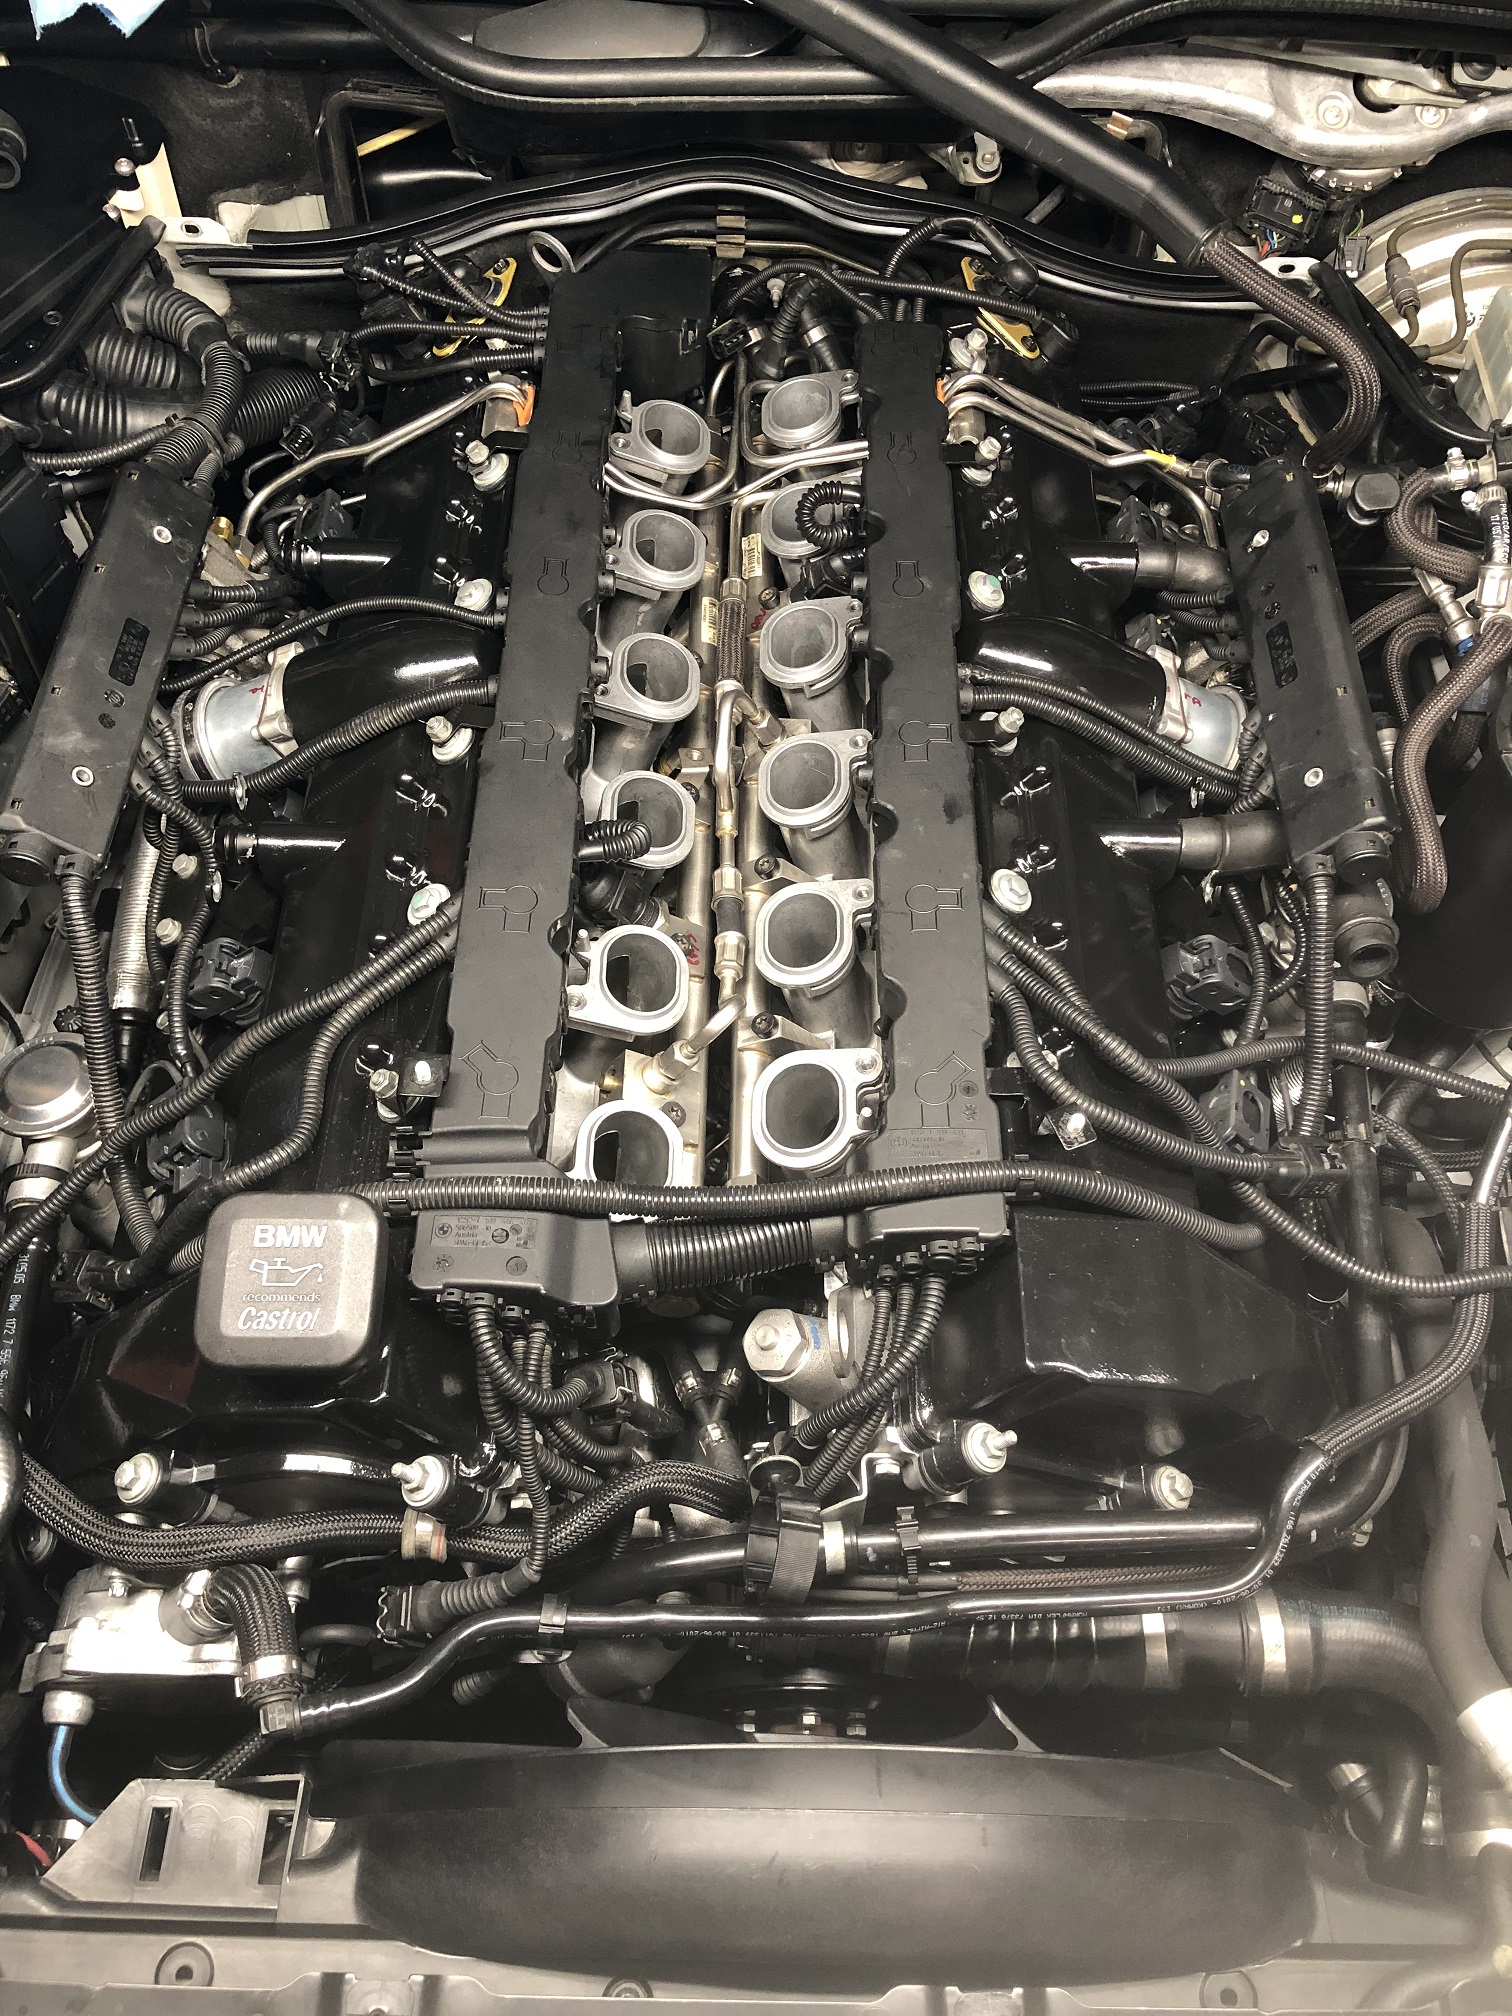
Intake manifold installed.
I smoke tested the install to verify no leaks anywhere.

Passenger side HPFP.


Almost back together now...

After putting it all back together it was running a bit rough so I decided to try swapping out the high pressure fuel pumps for a pair of brand new ones I picked up for a great price.
So off comes the intake manifold...
When first I started working on this car the mass of cables, hoses and pipes was a bit intimidating but now I know what every one of these does and its not so scary anymore.
Here are the brand new pumps installed (these are the later style pump with a different nipple on top but otherwise identical). These normally cost about $2,000 ea! I got both for $700... still a lot of money but quite a bargain!


And its all back together now.
I'm not so sure swapping the pumps helped, I think it just needed some time to dial itself in as it runs much smoother now.

Job done!
